How to Detail a Car with Vinyl Wraps
The Day I Discovered the Magic of Vinyl Wraps
It was a regular summer afternoon when I stumbled upon a car show in my hometown. I was captivated by a particular car that stood out from the rest. It was a classic Mustang, but it had a fiery red wrap that made it look otherworldly. I was in awe and immediately asked the owner about it. He introduced me to the world of vinyl car wraps and I haven’t looked back ever since.
The Art of Car Detailing with Vinyl Wraps
Contrary to what some might believe, car detailing with vinyl wraps is more than just slapping on a sticker. It’s an intricate process that involves the application of a thin vinyl film over the car’s surface. And this isn’t just any film – we’re talking about high-quality, durable, and visually stunning materials that can transform your vehicle into a unique masterpiece. It’s like giving your car a temporary tattoo, but better.
Why You Should Consider a Vinyl Wrap
Money Saver: Let’s face it, repainting a car can be very expensive. Vinyl wraps are a cost-effective alternative that also offers a wider variety of aesthetic choices. Plus, you can always remove or replace them when you fancy a change.
Protection for Your Car: Apart from the aesthetics, vinyl wraps also add a protective layer over the car’s original paint, shielding it from scratches, stone chips, and the harsh effects of weather. Think of it as a changeable armor for your car.
Unleash Your Creativity: With vinyl wraps, you’re not confined to the color palette offered by car manufacturers. You can choose any color, pattern, or design you want. It’s your car, your canvas.
Exploring the World of Vinyl Car Wraps
There’s a myriad of options when it comes to vinyl wraps, each offering unique effects and finishes. Here are some of the most popular types:
- Color Change Wraps: As the name suggests, these wraps allow you to change the color of your car without committing to a paint job. They come in a wide range of colors and finishes, including matte, gloss, metallic, and even chrome.
- Graphics Wraps: These are perfect for those who want their car to make a bold statement. You can choose from pre-made designs or create your own – the sky’s the limit.
- Ceramic Coating Wraps: These wraps provide the ultimate protection for your car. The ceramic coating makes the wrap more resistant to scratches and also gives it a beautiful glossy finish.
- Paint Protection Film (PPF): While not technically a wrap, PPF is a clear film that protects the car’s paint from scratches, chips, and UV rays. It’s perfect for those who want protection but don’t want to change the appearance of their car.
So, whether you’re a car enthusiast or a DIYer looking for your next project, car detailing with vinyl wraps is an exciting avenue to explore. It’s not just about the aesthetics but also about the protection and preservation of your vehicle. And who knows, you might just turn heads at the next local car show!
Tools Needed for Vinyl Car Wrap
Vinyl wrapping a car on your own can be a rewarding project, but it is essential to have the right tools on hand. The following is a detailed list of tools and materials needed for a vinyl car wrap:
– Vinyl Wrap: This is the primary material used to wrap your car. It comes in a variety of colors, finishes, and styles.
– Heat Gun: This tool is used to soften the vinyl, making it easier to shape around the curves of your car.
– Utility Knife: You’ll need this to trim excess vinyl.
– Squeegee: This tool helps to smooth out the vinyl and eliminate any bubbles.
– Detailing Tape: This is used to outline areas where the vinyl will be applied.
– Primer: Primer helps the vinyl adhere better to the car’s surface.
– Microfiber Cloth: This cloth is used to clean the surface of the car before the vinyl wrap is applied.
DIY Car Detailing with Vinyl Wraps: A Step-By-Step Guide
Step 1: Car Preparation: It is vital to thoroughly clean the car before applying the vinyl wrap. Use a microfiber cloth to wipe down the car’s surface and ensure it is free of any dust or debris.
Step 2: Choosing the Appropriate Vinyl Wrap: There are various types of vinyl wraps available, each with their own unique properties. Choose a vinyl wrap that suits your aesthetic preferences and durability needs.
Step 3: Applying the Vinyl Wrap: Begin by applying the vinyl wrap to the car’s surface, starting from the center and moving outwards. Use a squeegee to smooth out any bubbles and ensure the vinyl is adhering properly to the car’s surface.
Step 4: Heating and Molding the Vinyl: Use a heat gun to soften the vinyl, making it easier to mold around the car’s curves.
Step 5: Trimming and Finishing Off: Once the vinyl is properly molded to the car’s surface, use a utility knife to trim off any excess material.
Tips to Maintain Your Car’s Vinyl Wrap
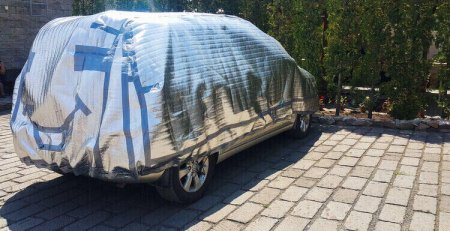
Maintaining your car’s vinyl wrap is essential for its longevity. Regular cleaning with a microfiber cloth and mild soap can help keep your wrap looking new. Avoid using harsh chemicals or abrasive cleaning tools that can damage the vinyl. It is also important to avoid prolonged exposure to sunlight, as it can cause the vinyl to fade over time.
Common Challenges When Applying Vinyl Wraps and How to Overcome Them
Applying a vinyl wrap to your car can be a challenging task, especially for beginners. Common problems include bubbles forming under the vinyl, difficulty shaping the vinyl around curves, and the vinyl not adhering properly to the car’s surface. These issues can be addressed by ensuring the car is thoroughly cleaned before application, using a heat gun to soften the vinyl, and applying primer to aid in adhesion.
FAQs about Car Detailing with Vinyl Wraps
Can I apply a vinyl wrap to a leased car? Yes, vinyl wraps can be applied to leased cars and can be removed without causing any damage.
Can a vinyl wrap damage the car’s paint? No, a properly applied vinyl wrap will not damage the car’s paint.
How long does a vinyl wrap last? A high-quality vinyl wrap can last up to seven years with proper care and maintenance.


