How to Polish Your Car’s Wheels
My Love Affair with the Wheel
Let me take you back to the summer of 1994. I was just a kid, knee-deep in my obsession with cars, specifically my dad’s cherished Oldsmobile. One scorching afternoon, my dad handed over the keys and said, “Son, it’s all yours.” The catch? I had to clean and polish the wheels. That’s right, the wheels! The shiny, chrome-plated dreams that spun the world around. I was confused, excited, and honestly, a little scared. But, as I scrubbed and polished those wheels, I discovered a feeling of accomplishment and pride that only DIY car wheel polish can give.
The Importance of Polishing Your Car Wheels
Polishing your car’s wheels is not just about the aesthetics; it extends to the functionality and longevity of your ride. Over time, brake dust, road grime, and salt can adhere to your wheels, causing corrosion and damage. Regularly polishing car rims can help keep corrosion at bay, maintaining the integrity of the wheels and enhancing your car’s overall appearance.
Moreover, a well-polished wheel is a testament to your love for your vehicle. It adds that extra sparkle, catching the eyes of admirers as you cruise down the road. Trust me, once you have experienced the joy of car maintenance by yourself, you will never look back.
Tools and Materials You’ll Need
Before you get started, gather your tools. For car wheel cleaning, you’ll need:
- Wheel cleaner
- Soft-bristle brush
- Microfiber towels
- Bucket of water
For the actual polishing, you will need:
- Wheel polish (Choose aluminum wheel polishing compound for aluminum wheels and chrome wheel polishing product for chrome wheels)
- Polishing pad or microfiber applicator
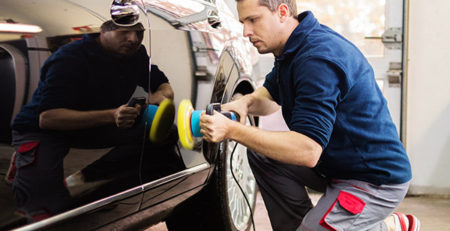
- Power drill with polishing ball attachment (optional but useful)
Don’t forget your protective gear. Safety goggles, gloves, and a dust mask will protect you from the dust and chemicals.
Preparations Before Polishing
Inspecting the wheels
Before you can get to rim cleaning tips, you need to inspect your wheels for any visible damage like cracks, deep scratches, or corrosion. This will not only help you identify if your wheels need more than just a polish but also give you a sense of satisfaction once you see the transformation after the job is done.
Removing the wheels
While you can certainly polish the wheels while they’re on the car, removing them gives you easier access to every nook and cranny. This ensures a more thorough clean and polish. But remember, safety first! Make sure you have a safe and stable setup for lifting your car.
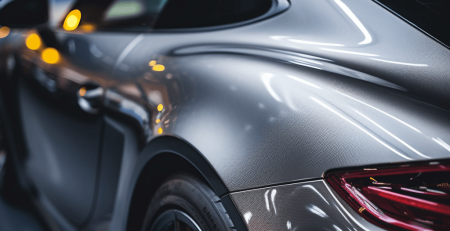
So, now that we’ve covered the basics, it’s time to get our hands dirty. In the next part, we will dive deep into the process of car detailing, including applying a ceramic coating and paint protection film (PPF) for that extra layer of protection and shine. So, stay tuned!
Comprehensive Steps on How to Polish Car Wheels
Polishing your car wheels not only enhances their appearance but also protects them from environmental damage. Here are the comprehensive steps on how to polish car wheels.
Cleaning the Wheels
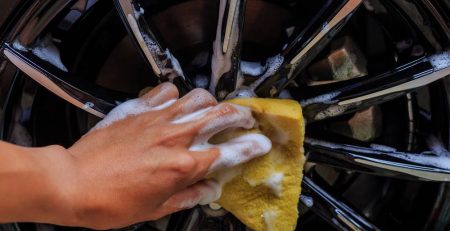
The first step is always to clean the wheels thoroughly. This removes dirt, grime, and brake dust that might scratch the wheel surface during the polishing process. You’ll need a good wheel cleaner, a soft brush, and a microfiber towel. Always clean one wheel at a time, starting from the top and working your way down to avoid dripping dirty water onto already cleaned areas.
Applying the Polish
Once the wheel is clean and dry, it’s time to apply the polish. Choose a high-quality metal polish that’s suitable for your wheel material. Apply the polish using a clean microfiber cloth or an applicator pad, working in small sections and using circular motions to ensure even application. The polish should dry to a hazy finish.
Buffing the Wheel Surface
After the polish has dried, you’ll need to buff the wheel surface. This is done using a clean, dry microfiber cloth. Buff the wheel in the same circular motions, removing the polish and revealing a shiny, polished surface. For stubborn areas, you may need to repeat the polishing and buffing process.
Applying a Protective Sealant
The final step is to apply a protective sealant. This will protect your newly polished wheels from the elements and ensure the shine lasts longer. Apply the sealant as you did the polish, allow it to dry, and then buff it off.
Dos and Don’ts When Polishing Car Wheels
Polishing car wheels can be a straightforward process if you follow the right steps. However, there are certain dos and don’ts to keep in mind.
Dos
- Do clean the wheels thoroughly before polishing.
- Do use a high-quality polish and sealant.
- Do work in a well-ventilated area.
Don’ts
- Don’t use abrasive materials that can scratch the wheel surface.
- Don’t polish wheels that are hot from driving or direct sunlight.
- Don’t forget to apply a protective sealant after polishing.
Tips and Tricks for Efficient Car Wheel Polishing
Want to make your wheel polishing process more efficient? Here are some tips and tricks.
- Use a wheel cleaner that changes color when it reacts with brake dust. This makes it easier to see and remove all the dirt and grime.
- Use a drill with a buffing wheel attachment to speed up the buffing process.
- Apply polish and sealant with a foam applicator pad for an even finish.
Troubleshooting: Addressing Common Issues When Polishing Car Wheels
Despite your best efforts, you might encounter some issues when polishing your car wheels. Here’s how to troubleshoot the most common problems.
Uneven Polish
If the polish is uneven, it could be due to applying too much product or not buffing it off properly. To fix this, remove the excess polish with a clean cloth and buff the surface again.
Scratches on the Wheel Surface
If you notice scratches on the wheel surface after polishing, it might be due to dirt or grime that was not removed during the cleaning process. To prevent this, always clean the wheels thoroughly before polishing.
Maintaining Polished Wheels
Maintaining your polished wheels is just as important as the polishing process itself. Regular cleaning is essential to prevent the buildup of dirt and grime that can dull the shine. Use a pH-neutral wheel cleaner to avoid damaging the protective sealant. Also, consider reapplying the sealant every few months to keep your wheels looking their best.


