How to Remove Tar from Your Car
Unraveling the Sticky Situation of Tar on Your Car
There I was, cruising down the newly paved highway, relishing the smooth ride. The shimmering heat radiating off the road ahead was the only reminder of the scorching summer day. As I pulled into my driveway, I noticed the dark specks splattered across the side of my car. Tar! A car owner’s nightmare.
What is Tar and Why It’s Stuck on Your Car
Tar, a sticky substance used in road construction, is notorious for clinging onto our beloved vehicles. Its stubborn nature, combined with the heat of the sun, causes it to adhere strongly to your car’s paint, making removal a tricky task. If left untreated, tar spots can cause considerable damage to your paintwork over time.
Preemptive Strikes Against Tar
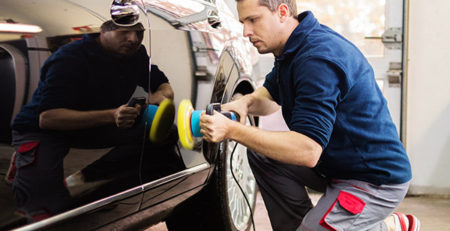
To avoid the headache of tar removal, prevention is key. Regular car detailing plays a vital role in maintaining your vehicle’s exterior. By keeping your car clean, you minimize the chances of tar sticking to the surface.
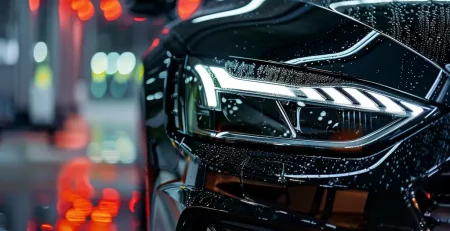
Moreover, investing in protective products like paint protection film (PPF) or ceramic coating can safeguard your car’s paint from the ravages of tar and other road grime. Think of these as your car’s armor, providing an extra layer of protection.
Tools of the Tar Removal Trade
But despite your best efforts, tar spots can still find their way onto your vehicle. Fear not, armed with the right tools and products, you can tackle this sticky situation head-on. A few essentials include a plastic scraper, microfiber cloth, and a commercial tar removal product.
There are several tar removal products available on the market, each with their unique formulas designed to dissolve tar without harming your car’s paint.
Removing Tar: A Step-by-Step Guide
When it comes to tar removal, patience is your best friend. Here’s a simple step-by-step guide to help you:
- Safely Loosen the Tar: Start by washing the area with soapy water to loosen the tar.
- Careful Scraping: Using a plastic scraper, gently remove the larger chunks of tar. Remember, the key is to be gentle to avoid scratching your paintwork.
- Apply the Tar Removal Product: Apply your chosen tar removal product as per the manufacturer’s instructions. Allow it to rest for the specified time.
- Rinse and Check: Rinse off the product and check if any tar remains. If necessary, repeat the process until your car is tar-free.
Safety First: Precautions During Tar Removal
While removing tar from your car, safety should be your top priority. Ensure you are equipped with personal protective gear, particularly gloves to safeguard your hands from the tar removal product.
Be cautious when scraping the tar off, applying gentle pressure to avoid damaging the paint. Moreover, it’s best to undertake this task in a cool, shaded area since heat can cause the tar to soften and spread, making the situation even worse.
In conclusion, while tar spots on your car can be a nuisance, they don’t have to be a nightmare. With the right knowledge, tools, and a dash of patience, you can restore your car to its pristine, tar-free glory.
DIY Home Remedies for Tar Removal
Sometimes, tar can stubbornly stick to your car, spoiling its shiny appearance. Fear not, you can use some everyday items to remove these pesky stains. WD-40 is a handy product to have around. Spray it on the tar, let it sit for a few minutes, then wipe it off with a clean cloth. The WD-40 will dissolve the tar without damaging your car’s paint.
Another unconventional but effective method is using peanut butter. Yes, you heard it right! The oils in the peanut butter can break down the tar. Apply some onto the stain, let it sit for a bit and then gently wipe it off.
There are other home products like mayonnaise, bug spray or even hand sanitizer that can help. Remember, the key is to let the product sit for a while to soften the tar before gently wiping it off.
Post-Tar Removal Car Care
Once the tar is gone, it’s time for some post-care. First, wash your car to remove any residue. Use a gentle soap to avoid damaging the paint.
Next, polish the area. Polishing helps restore the shine and protect the paint. Apply a small amount of car polish and buff it with a soft cloth.
Lastly, consider future preventive measures. Regular washing and waxing can prevent tar from sticking in the first place. Also, try to avoid driving on freshly tarred roads.
Common Mistakes to Avoid
When dealing with tar removal, avoid doing it under direct sunlight. The heat can make the tar harder to remove and can cause the removal products to dry too quickly.
Also, be careful not to leave the product on the paint too long. This can lead to staining or discoloration. Always follow the product’s instructions.
Remember to always use a soft cloth for wiping. A rough cloth or brush can scratch your car’s paint.
Important Reminders
Remember, time is of the essence. The longer the tar sits, the harder it is to remove. Act quickly to prevent permanent damage.
Always test a small area first before applying the product to a larger area. This can prevent potential damage to your car’s paint.
Lastly, never scrape tar off with sharp objects. This can lead to scratches and more damage to your car’s surface.
FAQs about Tar Removal
You may be wondering, “Will tar removers damage my car’s paint?” Most tar removers are designed to be gentle on paint, but always do a small test first.
If the tar is too hard to remove, consider seeking professional help. They have specialized tools that can safely remove stubborn tar without damaging your car.
Yes, you can prevent tar from sticking to your car. Regular washing and waxing can protect your car from tar and other road debris.
As for how often you should clean tar off your car, it depends on your driving conditions. If you often drive on tarred roads, you may need to clean your car more frequently.


